At work on a distributable (early early alpha) – Lets step this game up

Oh man oh man is this coming together nicely. For my team that reads this in the future (because they aren’t following my blog right now) thank you guys oh so much for your support and contributions so far.

I know it has been a long time since my last update, which should never happen again now that I’m done school! All the more time to dedicate to this project. So here is a quick little view of what I did over the last few hours, I’ve got a nice system for spawning a little portal effect, having an enemy spawn through it, then deleting the portal, activating collision and AI, and having the enemy come after you! I got a pretty quick video of the effect here, I didn’t want to spend a lot of time trying to get a good angle for the shot, when in the near future I can have some gameplay showing. I’ve got a few spells set up, nothing too exciting yet, but its interesting to experience (especially in virtual reality).

In closing for this short post.. I wish I had more 3d modellers.

Up to my old tricks

Well, 5:07 AM this time, and I just put in a request to delay the submission of my business plan to Leadership Grants Organization of Canada. I already have a full business plan that was put together in a business startup strategies class last semester, but there was a bit of information that was specific to this grant application, requesting some things in more detail, that I know to get the best chance of getting, I need to elaborate further. One thing in particular was demonstrating that I am providing “matching funds”, basically showing that they aren’t dumping money into a lost cause. So I have to show that, yes, I have spent X amount of dollars on my Oculus Rift and new workstation, ready for next-gen (next-next-gen now? where does next-gen end?) development, ready to be using the top technologies to bring new entertaining gameplay to gamers. All in all, I just feel like a little bit more time might make all of the difference. Gives me all that extra time to make the plan all that more appealing to the grant people, and it gives my team a little more time to do a few more things to show off (if they get the time).

As for game progress updates, well I had an amazing skype meeting with my writer the other day, we made the opening / background story much more well developed. I’ll have a little bit of her stuff to show off soon, the early website designs are online (I’ll show that off soon too). And my workstation is currently being assembled (finally), that means videos and big updates are coming soon. Soon soon soon, wow I feel like Blizzard.

Behavior Trees, AI, Objects, Gameplay.. So much progress! So few updates!

Well it’s 6:41 AM, I’m still fiddling around with the behavior tree. Spent about 12 of the last 48 hours getting the hang of more complex behaviors than just following, and I’m finally comfortable with where I’m at. I feel like at this point I can put in just about any type of enemy I want. Feel free to contact me if you have behavior tree questions, I’ve designed my own in c++, competed against Ben, my artist, (I’ll post it some day) and I think I’ve got a pretty good grasp on UE4’s implementation now. But despite the work I’m doing now, I’ll have to still come back and update it in the future to use this awesome EQS (Environmental Querying System) class that is suppose to be very performance friendly. I won’t post any pictures today because I’ll have videos soon (and even a demo uploaded in the coming weeks).

My workstation should be ready any day now (in the next week I hope?), after which I plan to start purchasing some assets with licenses so I can make some full levels with all 100% my content. I’ve also applied for a government startup grant which is going to go to legal stuff, and a small incentive for my friends/employees on my content pipeline. I have great art and models to show off when the time is right. A website design in the works (for the game, I will still keep this developer blog going), and have been talking to my writer about the story. So so much progress! 2015 is going to be quite the exciting year.

Cheers everyone.

Great Reception So Far

I had a business presentation the other day, kind of a Dragon’s Den type situation, presenting the work so far to a panel of professionals in a few various industries. This was more about the direction of the project, the early business plans, costs, revenue streams, and sales channels (Steam). This was not about investment money, and although the topic is something that was covered, it’s not something that I need to get into any time soon. Gameplay comes first.

The panel’s reception was very positive, the first question I got was “when can I play it?”. Well my latest work has been working with the networking features in UE4, and my new workstation any day now (parts have mostly arrived, assembly will start soon) will really help speed up the testing process, and will finally allow me to show you guys some videos of whats going on in the project.

The survey I conducted on SurveyMonkey really helped show the excitement of such an idea. If you want to take about 60 seconds to participate, you can do so here. I’ll just leave you with these results (which I love).

OverallReception


OculusRiftReception

There’s More to Game Design Than Game Design

The game is being designed from scratch around supporting comfortable virtual reality gameplay in a very successful yet underpopulated genre. The game will build upon the most popular and entertaining features of previous generations but will do so in a way that adheres to the guidelines of best practices for virtual reality. This will enable us to provide a modern taste of gamers’ favorite experiences, delivered using the polished visuals that only UE4 can offer, in a form that is not currently being approached by anyone else in the industry. This will be one of very few VR-RPGs available for the Oculus Rift, and will be its only entry hack-and-slash genre.


Just a little excript I like from a business document I’m working on at the moment. Earlier today I heard 2 samples from my audio people, a little main menu composition and a nice ambient level tune. I was very impressed, am really looking forward to putting it in.

I will share what I can soon! Just wanted to keep you guys updated.

Little Bit At A Time

I’ve got some AI up and running! I’ll get a combat system up so I can kill these buggers now and get them to use the loot system  I have setup and I will actually have something half playable! Of course I’m still waiting on some good assets, my 3D-Artist, Ben, has been busy with school stuff. For now I’ve just been using some free textures and models I’ve found.  I really hope to upload some videos soon showing some loot, the good models I’ve gotten from Ben so far, the inventory and equipping system for the time being, and some early spell prototypes! I’ll be starting my experiments with networking UE4 very soon.

Oh the awesome things that are to come… Stay tuned.


How many eyes do you see?eyes

Desperately Want My Workstation!

I know I have been putting off more updates, but progress has been moving along swiftly. Some video recording software like Fraps apparently has some issues with UE4 and DirectX11, so I haven’t been able to get proper videos of my latest features, and videos are absolutely necessary; pictures just can’t show the way things work. After looking into some video capture card options my in-house artist, Ben, suggested GeForce Experience Shadowplay, which is just  a GPU video capture method. I just need DDR4 memory to hurry up and be in stock!

So very soon I will be sharing more of the latest info for this project. Which, by the way, I still haven’t found the perfect name for yet. Still accepting ideas guys. I’ll leave you with this nice shot of the visual control path for my current inventory management system. Read from the left, down the tree, end on one of the blue nodes, which are just comments of what action was taken. Green and red comments are control path changes (true or false through if-statements).

Blueprint of early inventory system

Testing Interface

So I’ve done a lot over the past few days, oh it’s glorious when work shifts get canceled and assignments are delayed. I think I need to start posting smaller updates more frequently. Every time I finish implementing a feature, I seem to want to immediately integrate it into the system and make improvements so that it is correct and easily extendable. I end up doing this a few times and now I’m a little behind on my blog updates. As such, I’m going to try and do much more frequent updates to this blog, even if what I’m showing isn’t working correctly, just so I can keep the people following along informed, and keep as much of my time and effort as possible on the actual development.

Today I’ll just talk about the interface work I’ve done.


Still following the ever helpful videos of Hourences, I’ve learned how to implement a HUD. Although this type of interface, a simple 2D overlay onto the scene, is generally not recommended in virtual reality as per the Oculus Rift guide of best practices I posted recently,  it is suitable for testing the game logic I have added so far.

In this picture, we can see some gold piles (which I’ll talk about in my next post), as well as text showing the player’s health and amount of gold in the top left, and a small black O in the middle of the screen representing a crosshair, which lets the player know exactly which item/object/enemy they are targeting.

HUD

I was then able to implement a targeting system using ray-casting, and a simple post-processing shader that Hourences shows to create the outline effect for an object.

HUD selecting goldHUD selecting gold2HUD selecting sword

Through this targeting system the character is able to interact with objects in the world, in this case, pick up these objects and have them added to the character’s inventory. After Hourences’ basic instructions for setting this up, I went off on my own tangent with it. The outline effect you see is the result of a lot of tweaking and some research to solve some bugs after his tutorial, The most annoying bug was the jitter my outline seemed to have. After a good read about the graphics pipeline, I found that the temporal-AA of the GBuffer was causing this jitter. Through changing a few settings and I was able to move this effect to a different spot in the pipeline, which solved the issue. My “in-house” graphics guy, Ben, is eventually going to start experimenting with some of his own shaders. For now I’m just waiting for him to have some time around his own work and assignments to give me some assets I can use, like the sword shown above that he gave me a few days ago.

Next I wanted the outline color to distinguish what kind of item was being selected, but I won’t get into that much detail about the functionality of the different types of items in this post, I’ll just stick to GUI stuff.

HUD selecting chest

It was a bit more complicated than I was expecting, but in the process of changing the outline color for different objects I learned a great deal about manipulating post-processing effects during the game. By far the most helpful resource to implementation I had, once I learned exactly what I needed to implement, was here.

After I got both of the types implemented, I spent an hour or two completely organizing all the object-selection and outline-colorization functionality, redoing it where necessary, to make sure it can properly accommodate all the future additions that will be coming. As I wrote in some of my early documents about the game, extensiblity is a critical factor in all aspects of my development, and refactoring is something I’m willing to do at any time to keep it clean and efficient. My future self will thank me.

Here is what the Blueprint looks like, you can see functions I’ve made on the left side panel. The functionality of them are pretty simple for now, I’ll get into that in my next post.item interaction blueprint


The last type of user interface I was playing around with was an item screen, just some (temporary) way to show these swords that I have picked up. I didn’t want to use the HUD, keeping Oculus Rift in mind, so I know a 3D GUI is more necessary. This is what I strew together, each one of these would theoretically show a sword. Remember this is temporary.Item inventory


The other work I did over the past few days went into the design and functionality of the objects themselves, the gold pile and the chest, and loot spawning! I will have another post soon about all of that very soon.


Oculus Rift Best Practices

I was just having a discussion with my honors professor about my latest updates, and some things came up when discussing virtual reality. Specifically, how some things in VR cause nausea or general discomfort. To the gamer friends I know who have tried my Oculus Rift  of the things, and to myself, it feels absolutely normal; it’s an awesome experience. But there are many reports of people who, like my roommate, say it makes them feel uneasy. Maybe things aren’t yet perfected in the Oculus Rift DevKit 2, but this guideline of Oculus Rift Best Practices is meant to help programmers and designers in eliminating any of these feelings.

Keep in mind the technology is still very new. These guidelines will change and grow over time, and the consumer versions of the Oculus Rift will also have many upgrades to eliminate any perceived sickness. My game will have hundreds of hours of play testing on the Oculus Rift, with numerous testers, aimed at preventing any kind of discomfort from the game. 

Demonstration Level

The past few days following Hourences’ level design lessons has been very helpful. After his many insights into streamlining the content creation process, I feel that I have a much stronger grasp of the workflow Unreal Engine is designed for.

By using small, modular meshes and combining them into larger pieces, I’m able to avoid heavily relying on a 3D modeler to create architecture.

Step 1 of BridgeStep 2 of BridgeStep 3 of Bridge


I use this method to create a few different assets.

Completed BridgeSpire for CastleHallway


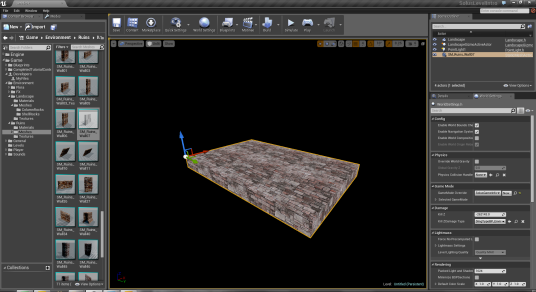
These groups of meshes are assets that I can then combine to create an even more elaborate part of the scene. This is a wireframe version of the constructed building using these parts.

Constructed Building


Through these processes, and using the meshes provided with Hourences’ tutorials, I’ve created a demonstration level. Although I don’t own the rights to the assets used in this demonstration level, this just serves as an excellent example of the level creation process I will employ with my own assets, as well as the ease of content creation made possible with UE4.

After the creation of the introduction building, the next step was to create outdoor terrain around it, which in UE4 is called the landscape. As seen in my previous post, I had been expecting to use the landscape to include impassible terrain, such as mountains, to better divide the outdoor areas. But as to the recommendation of Hourences, I believe I will mostly use it for the smoother, passable outdoor areas, still with some minor hills and valleys, but the main impassible terrain will be made from static meshes.

The landscape in the demonstration is sculpted directly from within UE4, and set to a custom size to accommodate the desired area. In the demonstration level, the landscape is set to a small size, just to surround the building and provide an outdoor area to populate and experiment with. The lessons also discussed his method of painting texture onto the landscape. It turned out much better than trying to work with the splatmap, but according to the community, the splatmap is still useful for extra detail.

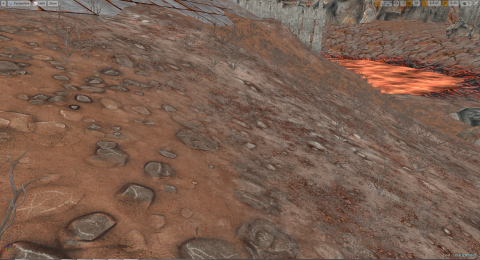
The current method for texturing the landscape is setting up a layered material, where any layer can then be painted onto the terrain. This allows a very realistic looking blend of the different materials on the terrain.

Landscape Texture

After sculpting and painting the terrain, and placing the previously constructed building in the level, I then populate the area with “doodads”. Doodads are a term I carry with me from creating Starcraft maps in the late 90s and early 2000s. A doodad in Starcraft was generally decoration for the level, whether it be rocks, trees, debris, or even doors. Some would also have different states, such as open or closed for a door. The doodads in the demonstration level would be all of the rocks and boulders, foliage, and any other objects decorating the playable area. At this point the construction of the scene is nearly complete.

Unlit Screencap 1Unlit Screencap 2Unlit Screencap 3Unlit Screencap 4Unlit Screencap 5Unlit Screencap 7Unlit Screencap 8


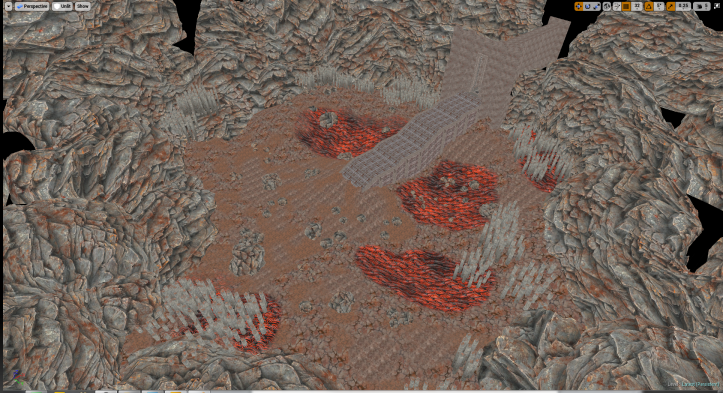
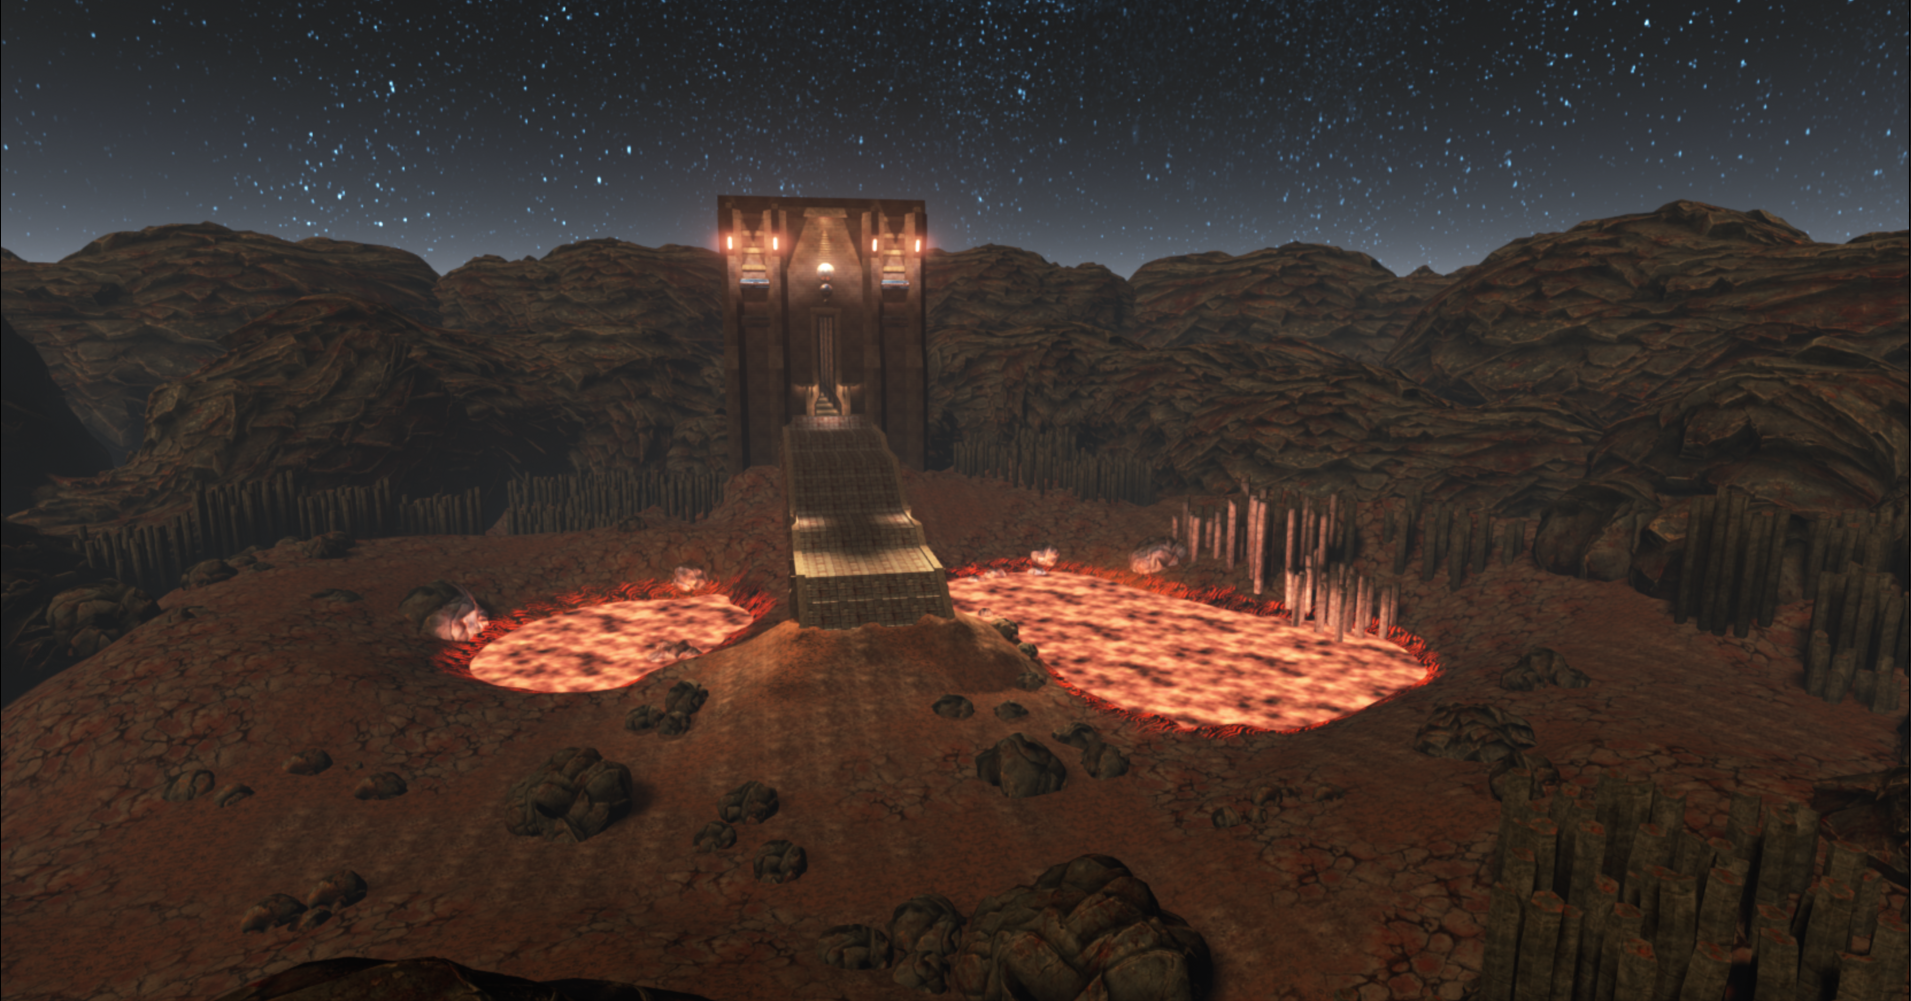
The next step of preparing the landscape was placing the lava plane. There is a single plane for the entire area, thus the lowest areas in the scene are the spots where there is lava. This involved a little bit of landscape adjustment, both sculpting and texturing, to properly adjust for this feature, and make sure the shape and texture of the terrain would properly accommodate the lava.

Unlit Screencap W/ Lava


The final stage of the landscape tutorial was on foliage. There is a foliage painter in UE4 that takes any number of meshes and allows them to be painted (quickly placed) into the scene. The tool has a few different settings, such as the density of mesh placement, alignment to surface normal, as well as allowing variations in pitch, rotation, elevation, and scale to the painted meshes. One of the major benefits of this tool is that the meshes are grouped for batch rendering, and the batch size can be changed. The lesson covered all of these settings, as well as proper painting techniques.

Foliage


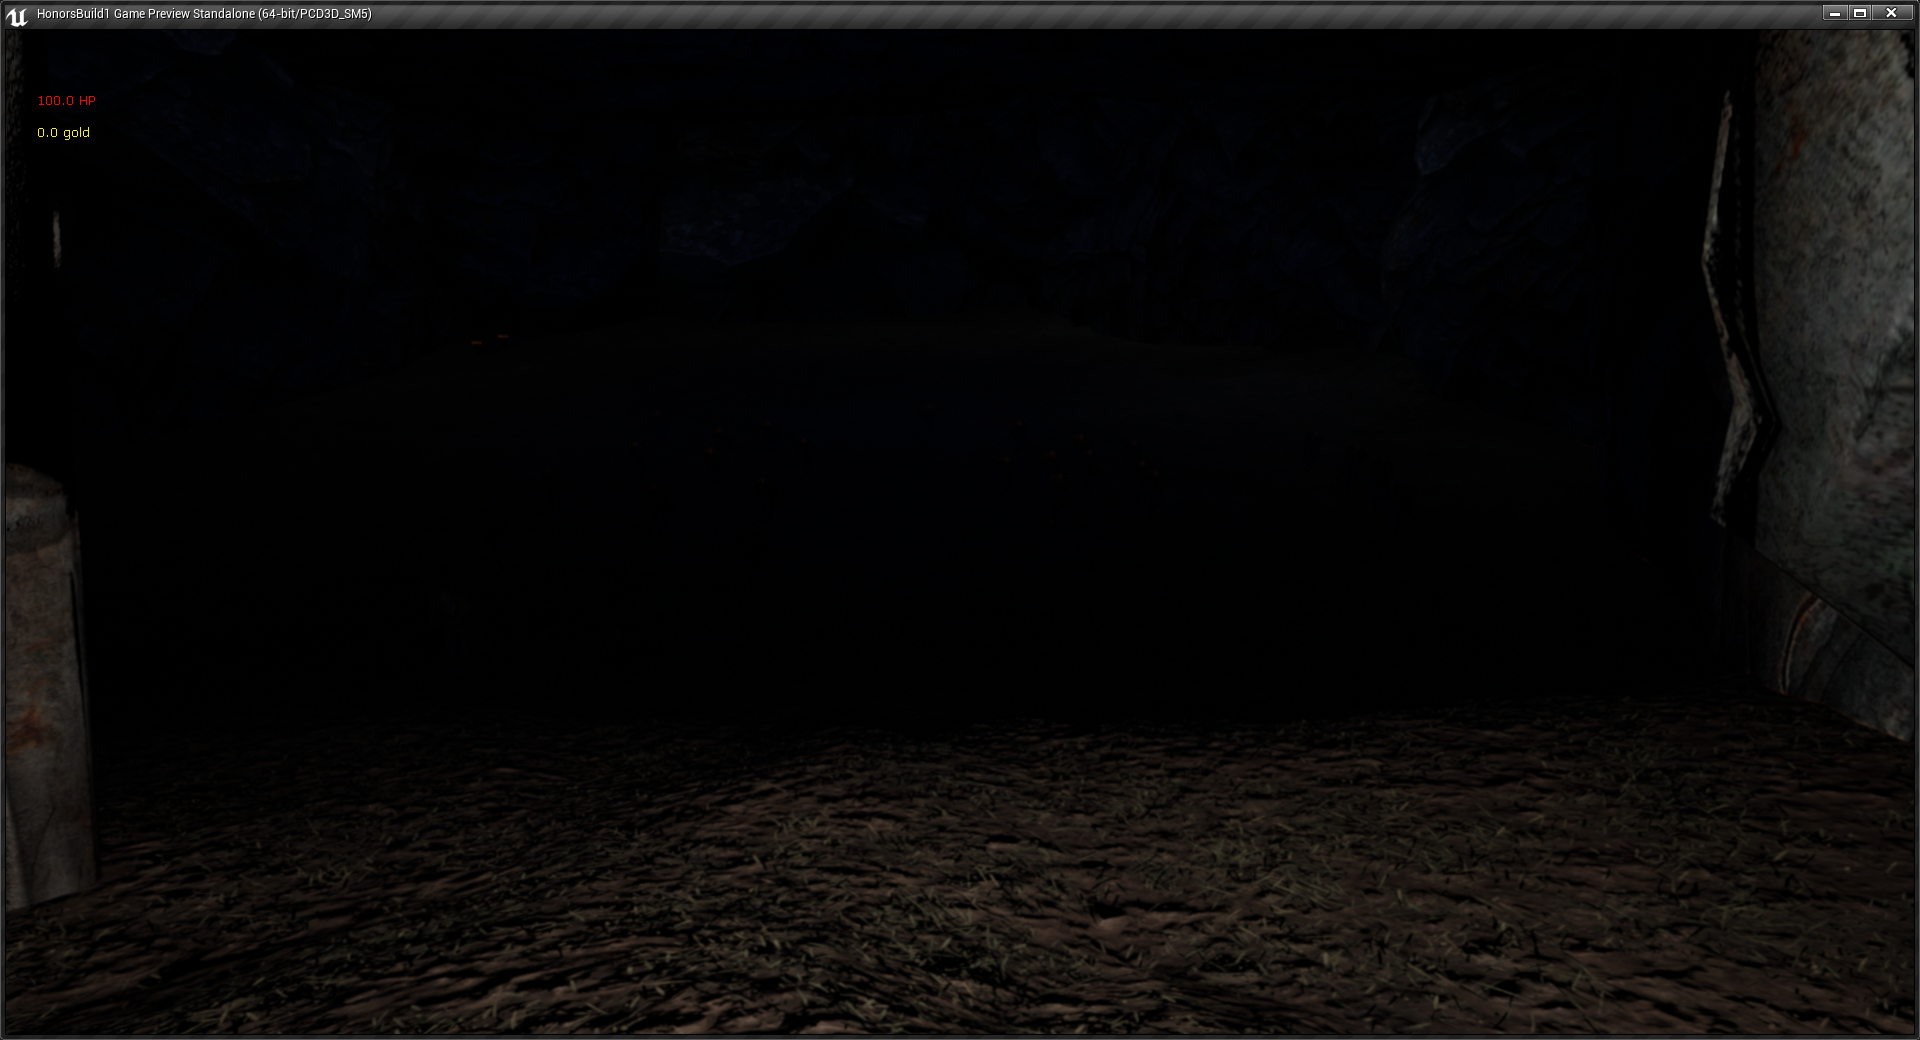
From here we have completed the construction of our scene, and can move on to lighting and final presentation touches. Lighting makes a huge difference in the feel of a scene, and Hourences’ did a good job of explaining how the lighting in UE4 functions, and his lighting techniques. Here is a lava pool without lights, and the same lava pool after my lighting has been applied.

unlit lava

Aside from the lit area in the bottom corner, the lava pool is very dark, and doesn’t really feel like hot deadly lava. The lighting gives it a much more menacing feel.Lava with lighting


In the final stages of the lessons I was taught how to properly apply post-processing, bloom, skyboxes, reflection capture actors, fog systems, scene management techniques, and various other aspects of UE4 which I won’t go into detail about today. Instead I’ll leave you with a few screenshots of the current version of my demonstration level, which I feel are pretty impressive for my current low (but quickly growing!) level of knowledge.

lit1 lit2 lit3 lit4 lit5 lit6lit7lit8lit9lit10moon